Let’s be honest, you know that feeling when you walk into your home and everything looks. Your space doesn’t have to feel stale when strategic changes can breathe new life into every room.
Here’s what’s fascinating: according to the Joint Center for Housing Studies of Harvard University (JCHS) Leading Indicator of Remodeling Activity (LIRA), our home renovation industry has exploded past $460 billion over the past two years.
What does this mean for you? These budget home upgrades pack a serious punch without demolishing your savings account. You won’t need professional expertise or expensive tools—just some weekend energy and smart planning to make your space feel completely refreshed.
1. Instant Wall Transformation With Removable Wallpaper
Here’s where magic happens. Your walls shape everything about how a room feels, and this is your chance to completely transform their personality without committing to permanent changes or dealing with contractor headaches.
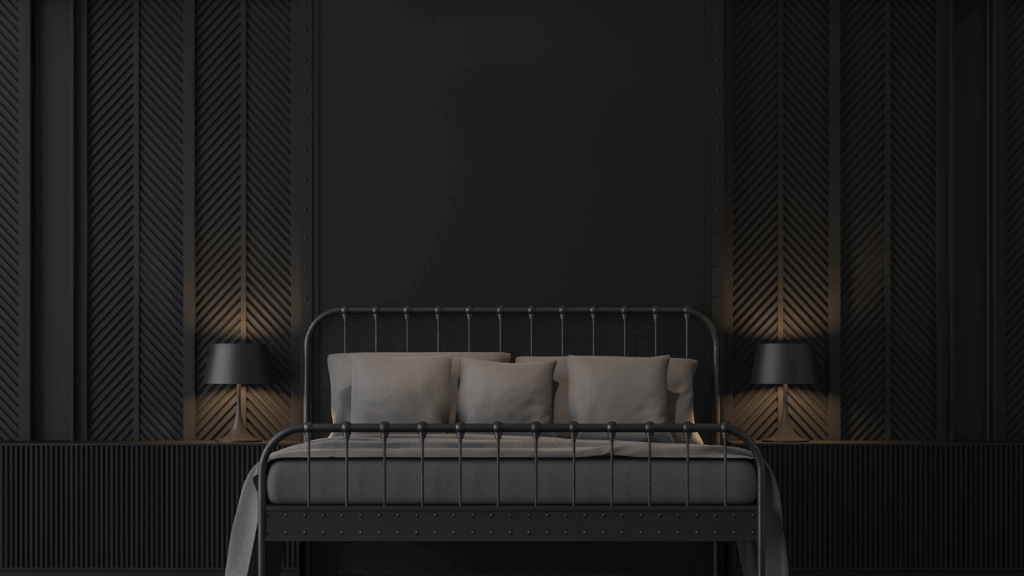
Black Peel and Stick Wallpaper for Modern Drama
Want to add instant sophistication? Nothing beats the dramatic impact of black peel and stick wallpaper, especially when you’re craving that modern, upscale vibe. The beauty lies in its simplicity—no professional installation required, no messy adhesives to wrestle with.
This bold choice works beautifully behind headboards, in cozy dining nooks, or as a stunning powder room statement. The secret? Balance becomes everything. You’ll want to pair those dark, dramatic elements with lighter furniture pieces and ensure you have adequate lighting to prevent the space from feeling cave-like. Try adding metallic accents or crisp white trim for that contemporary contrast that makes design magazines swoon.
Accent Wall Creation Techniques
Smart accent walls maximize impact without overwhelming smaller spaces. Think strategically about which walls naturally catch your eye first, typically those behind beds, sofas, or dining tables deliver the biggest visual payoff.
Here’s a pro tip that most DIYers miss: measure carefully and start from your room’s center, then work outward. This technique ensures balanced pattern alignment and prevents those awkward, uneven cuts at corners that scream “amateur hour.”
Pattern Mixing and Color Coordination Tips
Successfully combining patterns follows one golden rule: vary your scales. Mix large botanical prints with tiny geometric patterns, or blend stripes with florals using colors that play nicely together.
Before committing to entire walls, test your combinations with small samples. Digital room visualizers can help you preview how different patterns will interact with your existing furniture and lighting—saving you from costly mistakes.
2. Smart Lighting Upgrades for Ambient Appeal
Your stunning new wallpaper deserves lighting that showcases it properly, day and night. Lighting upgrades offer incredible bang for your buck when it comes to modernizing any space.
LED Strip Light Installation Behind Mirrors and Artwork
Hidden LED strips create that floating effect that makes artwork pop and mirrors appear almost magical. Battery-powered options eliminate wiring headaches while delivering weeks of continuous illumination.
Position your strips slightly behind frames to hide the actual bulbs while creating even light distribution. Warm white tones feel cozy in living areas, while cool white suits task-focused spaces like home offices.
Smart Switch Conversion Without Rewiring
Modern smart switches replace your standard switches without requiring additional wiring—bringing voice control and scheduling capabilities to existing fixtures. Most installations take under thirty minutes with basic tools.
These switches work perfectly with traditional bulbs while adding features like dimming, scheduling, and smartphone control. Renters love them because removal leaves zero permanent changes.
Statement Pendant Light Replacements
Swapping builder-grade fixtures for statement pendants instantly elevates any room’s sophistication level. Focus on entryways, dining areas, and kitchen islands for maximum impact.
Choose fixtures proportional to your space—larger rooms can handle bold, oversized pieces while smaller areas need more delicate options that don’t overwhelm.
3. Hardware Refresh That Changes Everything
Here’s something most people overlook: cabinet pulls, door handles, and fixtures act like jewelry for your rooms. These finishing touches create surprisingly large visual improvements throughout your entire home.
Cabinet Pull and Knob Replacement Guide
Updating cabinet hardware delivers one of the highest impact-to-cost ratios in home improvement ideas. Before shopping, measure your existing hole spacing to ensure proper fit without additional drilling headaches.
Brushed gold and matte black finishes feel contemporary and fresh, while brushed nickel provides that timeless appeal that won’t feel dated in five years. Maintaining consistency throughout connected spaces creates cohesive flow that feels intentionally designed.
Door Handle and Hinge Updates
Replacing dated brass or chrome handles with modern alternatives transforms every room entry. Consider matching your interior door hardware to cabinet choices for that unified aesthetic that screams “professionally designed.”
Don’t overlook hinges—swapping shiny brass for oil-rubbed bronze or black creates subtle but noticeable improvements that elevate the entire look.
Faucet and Fixture Modernization
Kitchen and bathroom faucets significantly impact both daily functionality and visual appeal. Many modern faucets install using existing connections, making replacement surprisingly straightforward.
Look for features like pull-down sprayers or touchless activation that combine style with enhanced functionality—because why not make your life easier while making it prettier?
4. Textural Elements for Instant Sophistication
Adding strategic textural elements transforms your space from simply updated to genuinely sophisticated. These easy home renovations create depth and visual interest without major construction disruption.
Removable Wood Plank Accent Walls
Peel-and-stick wood planks provide rustic warmth without permanent installation commitment. They work particularly well in bedrooms, home offices, or as kitchen backsplashes that add character.
Choose planks with realistic wood grain patterns and varying widths for authentic appearance. Installation requires only basic measuring and cutting skills—nothing intimidating here.
3D Wall Panel Installation
Three-dimensional panels add architectural interest to boring flat walls. Lightweight foam options install with construction adhesive and can be painted to match any color scheme you’re dreaming of.
These panels work beautifully in dining rooms or as bedroom headboard alternatives, creating custom built-in appearances at a fraction of traditional costs.
Stone Veneer Backsplash Application
Peel-and-stick stone tiles bring natural texture to kitchens and bathrooms without grouting or sealing hassles. They resist moisture while providing an authentic stone appearance that feels expensive.
Start installations from center points and work outward for balanced layouts. Cut tiles with utility knives for perfect fits around outlets and fixtures.
5. Creative Storage Solutions That Double as Decor
Combining aesthetics with clever storage ensures your newly refreshed space stays organized and functional. Here’s an eye-opening statistic: according to Storage Cafe’s annual survey, 33% of Americans use self-storage, and 18% plan to rent storage units in the future. These simple DIY projects eliminate that need while beautifying your space.
Floating Shelf Gallery Walls
Floating shelves create display opportunities while providing practical storage solutions. Vary heights and lengths for dynamic arrangements that showcase books, plants, and decorative objects beautifully.
Install shelves using proper wall anchors rated for intended weight loads. Distribute items by height and color for visually balanced compositions that feel curated, not cluttered.
Multi-Functional Ottoman and Bench DIY
Storage ottomans serve as seating, footrests, and hidden storage simultaneously—talk about multitasking! Basic woodworking skills and upholstery techniques create custom pieces perfectly sized for your specific space.
Choose fabrics that complement existing furniture while providing durability for daily use. Adding casters allows easy mobility between rooms as your needs change.
Hidden Storage Integration
Built-in appearance storage solutions maximize space efficiency beautifully. Under-stair areas, window seats with lift-top storage, and hollow ottomans provide concealed organization that keeps clutter at bay.
These projects often require basic carpentry skills but create permanent value additions that benefit long-term home functionality.
6. Window and Door Frame Makeovers
Directing attention to windows and doors completes your room’s transformation from floor to ceiling. These often-overlooked elements significantly impact overall room appearance and even energy efficiency.
Trim Upgrade and Molding Addition
Adding decorative trim transforms plain doorways and windows into architectural features that feel custom and expensive. Pre-made molding profiles installed with basic measuring, cutting, and nailing skills.
Choose trim proportional to your room height, higher ceilings can accommodate wider, more elaborate profiles while standard ceiling heights need simpler designs that don’t overwhelm.
Window Film for Privacy and Style
Decorative window films provide privacy without blocking precious natural light. Frosted, etched, or patterned options suit different aesthetic preferences while eliminating the need for traditional window coverings.
Application requires careful measurement and squeegee technique for bubble-free results. Remove films easily without residue when you’re ready for changes.
Tools and Materials Shopping Guide
Proper preparation prevents frustration and costly mistakes. Having explored all upgrade categories, you’re ready to turn inspiration into action with the right tools and materials.
Essential Tool Kit for DIY Home Upgrades
Basic tool collections handle most budget home upgrades successfully. Invest in quality drill/driver, level, measuring tape, utility knife, and stud finder for versatile project capability.
Add specialty tools as specific projects require rather than purchasing everything upfront. Many hardware stores rent expensive tools for occasional use—smart financial planning.
Budget-Friendly Material Sources
Compare prices across big-box stores, local hardware shops, and online retailers for best values. End-of-season clearances often provide premium materials at significant discounts that stretch your budget further.
Consider slightly imperfect or discontinued items for substantial savings on materials that won’t show minor flaws in finished projects.
Safety and Preparation Essentials
Before diving into your first project, proper safety protocols prevent accidents and ensure professional-quality results. Preparation often determines project success more than actual skill level.
Room Preparation and Protection Methods
Protect existing surfaces with drop cloths and painter’s tape. Remove or completely cover furniture rather than attempting to work around obstacles—trust us on this one.
Adequate ventilation becomes crucial when using adhesives, paints, or solvents. Open windows and use fans for proper air circulation.
Electrical Safety Guidelines
Turn off power at circuit breakers when working near electrical outlets or fixtures. Use voltage testers to confirm power disconnection before beginning any work.
When you’re unsure about electrical projects, consult qualified electricians rather than risking safety or code violations, some things aren’t worth the DIY risk.
Common Questions About DIY Home Upgrades
Which DIY home upgrades provide the best return on investment?
Paint, hardware updates, and lighting improvements typically offer the highest impact-to-cost ratios while requiring minimal specialized skills or expensive tools.
How long do these easy home renovations typically take to complete?
Most individual projects complete within one to three days, depending on room size and complexity of your chosen upgrades.
Can renters safely implement these home improvement ideas without damaging property?
Absolutely! Removable wallpaper, peel-and-stick tiles, and hardware swaps reverse completely without permanent alterations to rental properties.

